
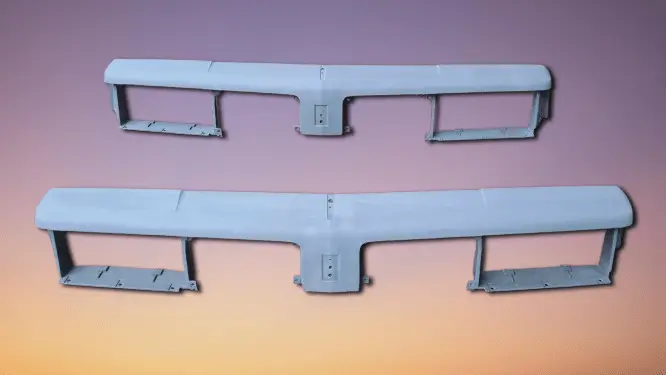
The 1986-1988 Oldsmobile Cutlass Supreme remains one of the most popular G-body platforms for both restorations and custom builds. Many owners want a cleaner, more modern front appearance, and the 1986-1988 Cutlass Supreme Euro Bare Header Panel delivers exactly that — a smooth, ready-to-paint panel designed for full customization.
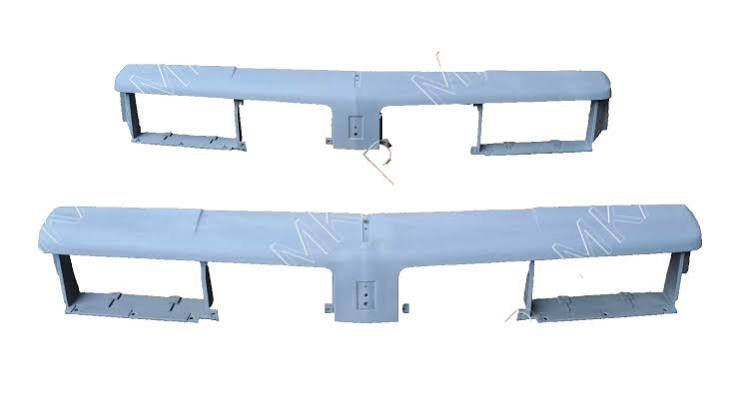
Unlike finished panels, the bare version gives you complete control over color, finish, and overall style. It serves as the ideal foundation for a Euro-inspired or fully custom front end while maintaining correct fitment with the rest of the car.
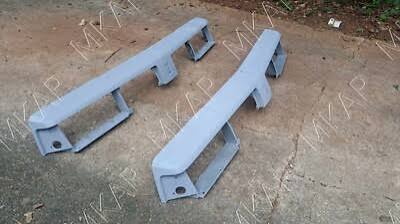
In this guide, we’ll explain what the Euro Bare Header Panel offers, why it’s a smart choice for custom builds, and how this upgrade can transform the look of your Cutlass Supreme.
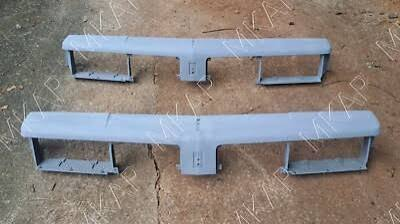
What Is a Euro Bare Header Panel?
The Euro Bare Header Panel is a modern, European-inspired replacement for the factory header panel. Key characteristics include:
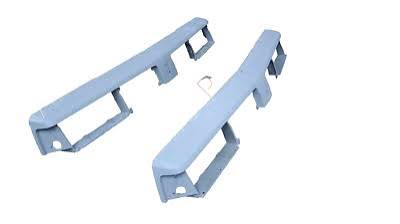
- Clean, smooth contours with a contemporary profile
- Bare, ready-to-paint surface for full customization
- Direct-fit design that works with existing fenders and lighting
- A strong foundation that pairs perfectly with Euro headlamp bezels, grilles, and emblems
Because it arrives unfinished, you can paint it to match your body color, create a contrasting accent, or apply any custom finish you prefer.
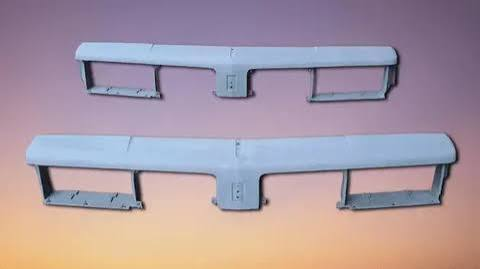
Why Choose a Bare (Ready-to-Paint) Panel?
A bare header panel offers several advantages over pre-finished versions:
- Complete control over the final color and finish
- Ability to match existing paint or create a unique look
- Flexibility for custom or show-quality paintwork
- Ideal for builders who want a seamless, integrated appearance
This makes the Euro Bare Header Panel especially popular among resto-mod and custom G-body enthusiasts.
Benefits of the Euro Bare Header Panel
Installing a quality 1986-1988 Cutlass Supreme Euro Bare Header Panel offers several strong advantages:
- Creates a modern, aggressive front-end appearance
- Provides a clean, paintable base for full customization
- Gives the car a sharper, more premium look once finished
- Increases visual appeal at car shows and cruise nights
- Works seamlessly with other Euro or custom front-end parts
- Offers an affordable path to a high-impact transformation
Many owners find that painting and installing this panel completely changes the character of the front end.
Who Should Consider This Upgrade?
This bare panel is ideal for:
- Owners building a custom or resto-mod style Cutlass Supreme
- Drivers who want full control over paint and finish
- Enthusiasts pairing the panel with Euro headlamp bezels and grilles
- Anyone looking for a high-impact visual change with maximum personalization
It works especially well when combined with a matching Euro grille, clear bezels, and a custom emblem for a fully coordinated front end.
Installation Overview
Installing the Euro Bare Header Panel is a manageable job for most classic car owners. The basic process includes:
- Removing the old factory header panel and related components
- Cleaning all mounting surfaces thoroughly
- Preparing and painting the new bare panel to your desired finish
- Aligning and securing the painted panel with factory-style fasteners
- Reinstalling headlights, grille, and bezels as needed
Most people complete the mechanical installation in 1–2 hours after the panel has been painted. Proper preparation and paintwork are key to a professional result.
Tips for the Best Results
- Have the panel professionally painted or use high-quality materials for durability
- Pair it with Euro headlamp bezels and grille for maximum impact
- Replace related hardware and seals during installation
- Check all panel gaps carefully for factory-quality alignment
- Consider a matching Euro emblem to finish the look
These details help create a clean, cohesive, and long-lasting custom front end.
Final Thoughts
If you want to give your 1986-1988 Cutlass Supreme a cleaner, more modern front appearance with full control over the final look, the 1986-1988 Cutlass Supreme Euro Bare Header Panel is an excellent choice. It delivers a strong visual foundation and the flexibility to create a truly personalized front end.
Whether you’re finishing a full custom build or simply updating the exterior, this bare Euro panel can help your Cutlass stand out with a sharper, more contemporary style that still respects the classic G-body design.
FAQ
Will this bare Euro header panel fit my 1987 Cutlass Supreme? Yes. The panel is designed specifically for 1986-1988 Oldsmobile Cutlass Supreme models.
Is the panel ready to install or does it need painting? It is a bare panel, ready for painting to your desired color and finish.
What material is the panel made from? High-strength automotive-grade composite material built for durability and easy painting.
How difficult is installation? Straightforward. Most owners complete installation in 1–2 hours after the panel has been painted.
Should I pair this with other Euro parts? Yes. It looks best with Euro headlamp bezels and grille for a complete custom front end.
Are these OEM genuine parts? These are high-quality aftermarket panels built for custom Euro styling while maintaining excellent fitment.The 1986-1988 Oldsmobile Cutlass Supreme remains one of the most popular G-body platforms for both restorations and custom builds. Many owners want a cleaner, more modern front appearance, and the 1986-1988 Cutlass Supreme Euro Bare Header Panel delivers exactly that — a smooth, ready-to-paint panel designed for full customization.
Unlike finished panels, the bare version gives you complete control over color, finish, and overall style. It serves as the ideal foundation for a Euro-inspired or fully custom front end while maintaining correct fitment with the rest of the car.
In this guide, we’ll explain what the Euro Bare Header Panel offers, why it’s a smart choice for custom builds, and how this upgrade can transform the look of your Cutlass Supreme.
What Is a Euro Bare Header Panel?
The Euro Bare Header Panel is a modern, European-inspired replacement for the factory header panel. Key characteristics include:
- Clean, smooth contours with a contemporary profile
- Bare, ready-to-paint surface for full customization
- Direct-fit design that works with existing fenders and lighting
- A strong foundation that pairs perfectly with Euro headlamp bezels, grilles, and emblems
Because it arrives unfinished, you can paint it to match your body color, create a contrasting accent, or apply any custom finish you prefer.
Why Choose a Bare (Ready-to-Paint) Panel?
A bare header panel offers several advantages over pre-finished versions:
- Complete control over the final color and finish
- Ability to match existing paint or create a unique look
- Flexibility for custom or show-quality paintwork
- Ideal for builders who want a seamless, integrated appearance
This makes the Euro Bare Header Panel especially popular among resto-mod and custom G-body enthusiasts.
Benefits of the Euro Bare Header Panel
Installing a quality 1986-1988 Cutlass Supreme Euro Bare Header Panel offers several strong advantages:
- Creates a modern, aggressive front-end appearance
- Provides a clean, paintable base for full customization
- Gives the car a sharper, more premium look once finished
- Increases visual appeal at car shows and cruise nights
- Works seamlessly with other Euro or custom front-end parts
- Offers an affordable path to a high-impact transformation
Many owners find that painting and installing this panel completely changes the character of the front end.
Who Should Consider This Upgrade?
This bare panel is ideal for:
- Owners building a custom or resto-mod style Cutlass Supreme
- Drivers who want full control over paint and finish
- Enthusiasts pairing the panel with Euro headlamp bezels and grilles
- Anyone looking for a high-impact visual change with maximum personalization
It works especially well when combined with a matching Euro grille, clear bezels, and a custom emblem for a fully coordinated front end.
Installation Overview
Installing the Euro Bare Header Panel is a manageable job for most classic car owners. The basic process includes:
- Removing the old factory header panel and related components
- Cleaning all mounting surfaces thoroughly
- Preparing and painting the new bare panel to your desired finish
- Aligning and securing the painted panel with factory-style fasteners
- Reinstalling headlights, grille, and bezels as needed
Most people complete the mechanical installation in 1–2 hours after the panel has been painted. Proper preparation and paintwork are key to a professional result.
Tips for the Best Results
- Have the panel professionally painted or use high-quality materials for durability
- Pair it with Euro headlamp bezels and grille for maximum impact
- Replace related hardware and seals during installation
- Check all panel gaps carefully for factory-quality alignment
- Consider a matching Euro emblem to finish the look
These details help create a clean, cohesive, and long-lasting custom front end.
Final Thoughts
If you want to give your 1986-1988 Cutlass Supreme a cleaner, more modern front appearance with full control over the final look, the 1986-1988 Cutlass Supreme Euro Bare Header Panel is an excellent choice. It delivers a strong visual foundation and the flexibility to create a truly personalized front end.
Whether you’re finishing a full custom build or simply updating the exterior, this bare Euro panel can help your Cutlass stand out with a sharper, more contemporary style that still respects the classic G-body design.
FAQ
Will this bare Euro header panel fit my 1987 Cutlass Supreme? Yes. The panel is designed specifically for 1986-1988 Oldsmobile Cutlass Supreme models.
Is the panel ready to install or does it need painting? It is a bare panel, ready for painting to your desired color and finish.
What material is the panel made from? High-strength automotive-grade composite material built for durability and easy painting.
How difficult is installation? Straightforward. Most owners complete installation in 1–2 hours after the panel has been painted.
Should I pair this with other Euro parts? Yes. It looks best with Euro headlamp bezels and grille for a complete custom front end.
Are these OEM genuine parts? These are high-quality aftermarket panels built for custom Euro styling while maintaining excellent fitment.